
This week I decided to do a costume inspired DIY that would be great this year for Halloween. It also works for any age, young kids or adults, and can have many different variations to fit what supplies you have at home. This whole DIY cost under $4 for me (I already had the glitter, string and glue gun) and it was so much fun to make!
Supplies:
- Fake Flowers (97 cents at Walmart I bought 2 different colors)
- Felt (23 cents per sheet at Walmart, I purchased 3 different colors)
- Hot Glue Gun
- Glitter
- String
- Headband Base ( $1 at the dollar tree, make sure to pick one with a thicker base so you have a lot of room to glue on all of your items)
Step 1:
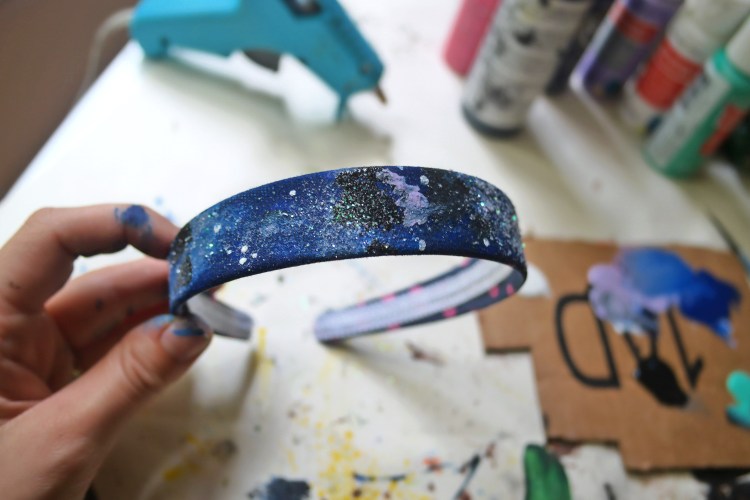
First I painted the outside of my headband in case any parts would show through, I didn’t want any one to see the original pink polka dots. I tried to paint mine to look like a galaxy, but I would recommend just doing it all one color to save time since most of it will be covered in the end. Let that dry completely before gluing anything onto it.
Step 2:
While that is drying you can prep your items. I snapped the tops of the flowers off with wire cutters and set them aside. I also made about 6 felt leaf shapes, by cutting out triangles and then rolling them to create a leaf that is more 3d then flat.
Step 3:
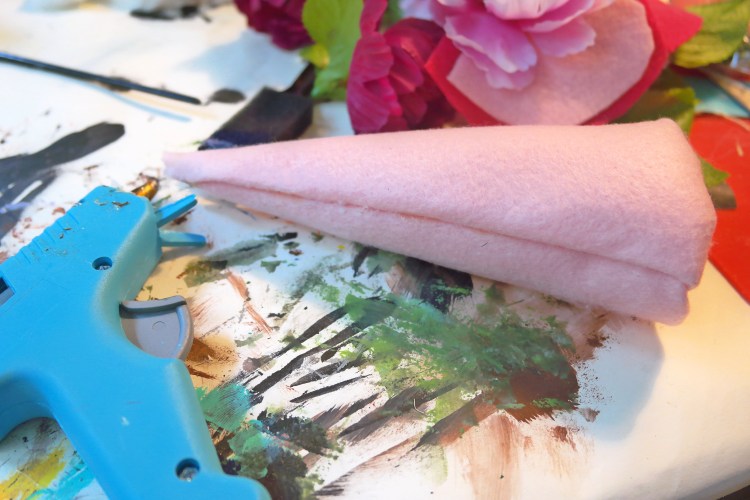
Then I made the unicorn horn, it was really simple I just rolled the sheet of pink felt into a cone shape and hot glued it together. You can also purchase a foam cone from dollar tree and paint it or glue the felt to it. I then took some pink string and wrapped it around the horn to make it look like it was spiraling around the horn and just secured it with the hot glue gun. After gluing it all together I grabbed the glitter and just sprinkled some on, you could also take Elmers glue and glue on a bunch if you want more glitter.
Step 4:
With your felt you need to cut out four ear shapes, 2 of them a little smaller to set inside the other. I used two different shades of pink for the ears. After cutting them I then glued them together so they are ready to put on the headband.
If you do not want to purchase the fake flowers you can make your own out of felt and it would look just as good, it would be a little more time consuming but it would turn out wonderful.
Step 5:
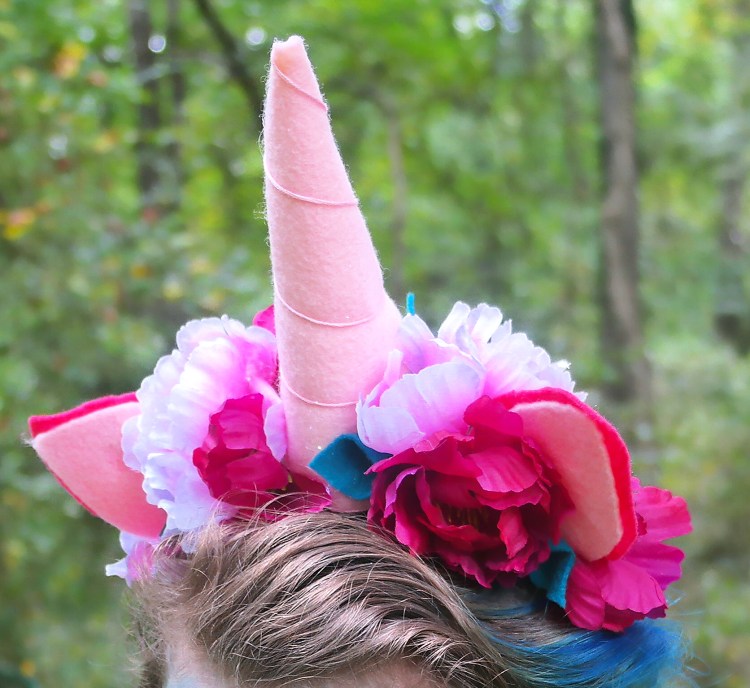
Now that your headband is dry and your items are prepped, it all goes together quickly. I would recommend laying it out first to see if you like the arrangement of the flowers. Glue on the horn first right in the center of the headband. Then you need to put in on and look in the mirror and see what location you want the ears to be in. Glue on the ears, its okay if they are not sticking up correctly yet because you will be gluing a lot around them to get them to set up right.
Step 6:
Now grab your flowers and glue all around the headband, you want to cover all most all of the headband. I added in the felt leaves at the end to make a color contrast and to tie everything together.
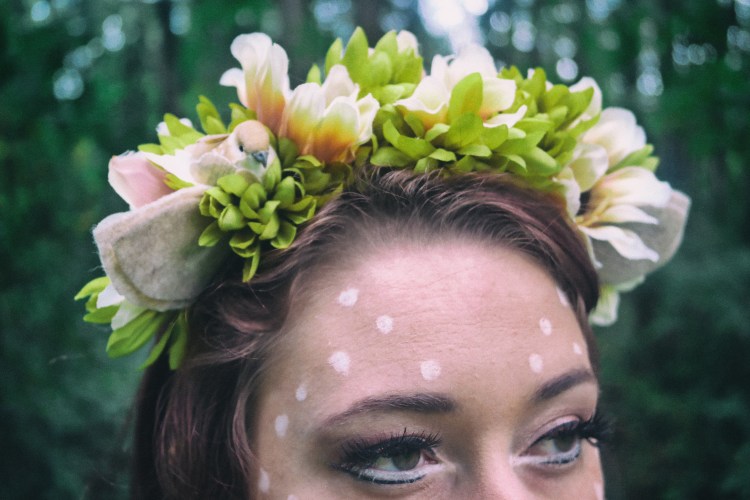
It turned out magical!! You can also do many variations on this for Halloween, I think this would be an excellent idea for a young girl or anyone who dreams of being a unicorn. I did two different headbands the other is inspired by a fawn or deer, but you could do almost any animal and it would work.


Discover more from Holy Homesteading
Subscribe to get the latest posts sent to your email.


This has to be one of the cutest things ever! I’m so excited to try this out with my little girl :D thanks for the inspiration!
LikeLike