
I love decorating my blue jean jacket so I decided to give hand embroidery a try! Embroidery can be hard but it reminds me of lettering, it’s relaxing and you can do it whenever you have extra time or are waiting on something. Check out my hand embroidered patches DIY below!
Supplies:
- Fabric (Muslin or canvas)
- Embroidery Hoop
- Heat n Bond
- Iron
- Embroidery floss
- Embroidery needle
- Pen or fabric pencil
- Scissors
- Glue (not water soluble)
How to: 
Pick out your fabric and put it into your embroidery hoop. I found that muslin works well or canvas. I’ve heard of people using old blue jean fabric or felt too. Whatever works for you is fine, I used a blue Linen from an old shirt because I wanted a blue outline around my cactus.
The first step after setting up your embroidery hoop is to draw out your design onto your fabric. I just used a pen to draw mine on because I was going to cover the whole thing with thread.
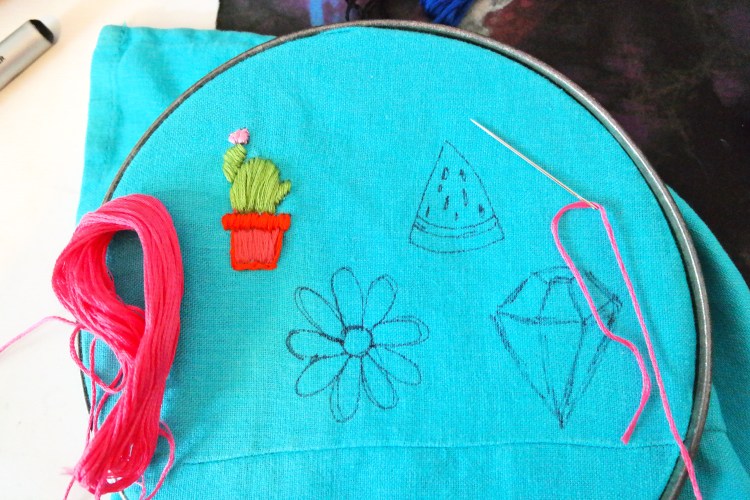
Now you can pick out the thread colors that you want and thread your needle. Some people split the embroidery floss so it goes farther and I’m sure you can be more detailed that way, I left mine whole.

Then start filling in your design. I have never done much with embroidery so I was just winging it with how I filled it in. You can search online or on YouTube for different stitches and methods for embroidery.
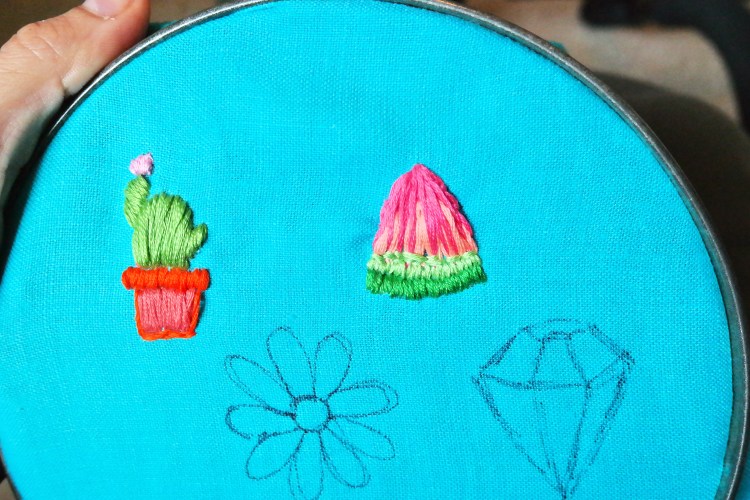
After its all filled in add any little details that you want before applying the heat n bond. I added seeds to my watermelon you could also do a black outline around your design if you want it to look more patch like.

Heat n Bond is an iron on adhesive that you put onto the back and it allows you to iron on the patch onto whatever you want just like you would to a store bought patch.

Cut out a piece of heat n bond that will cover your designs. Pull your fabric out of the embroidery hoop and with the paper covered side up iron on your heat n bond to the back of your design. You can just follow the instructions on the packaging.

Now cut out your designs, you can cut close to your design or leave an edge its completely up to you and the look you are going for. If you cut close to the design make sure not to cut into your string because it will ruin all of your hard embroidery work.

After cutting it out take some glue and hit the edges so that the fabric will not fray. You can get specific no fray fabric glue or just use any non water soluble glue.

You can pull off the back paper off of the Heat n Bond and this is what the backs will look like(pictured above).
Now you are ready to attach your new patches onto your jean jacket or whatever you are decorating!
Iron on your patches just like you would any patch and you are all done with this super fun DIY!

Happy Crafting!
Discover more from Holy Homesteading
Subscribe to get the latest posts sent to your email.


One thought on “DIY Hand Embroidered Patches!”