
I love decorating Easter eggs. I know it’s not a highly spiritual event, but I try to make time to do so, either alone, with my husband, or with my friends’ kids every year. It’s an annual art outlet for my creative side – one I don’t let out often because I don’t have the patience to perfect my drawing or painting skills. But coloring or painting eggs is a half-day affair, not a lifetime pursuit of artistic grandeur.
This year I decided to try something new. I wanted to break open my neglected nail polishes to decorate eggs. There is one caveat to this artistic pursuit, though:
When you decorate eggs with nail polish, you can’t eat them.
Unfortunately, nail polish is technically toxic. (Why it’s okay to use on our nails, I’m not sure, but that’s a topic for another day….) There are non-toxic brands out there, but they are still not food safe.
I’m not going to make hard-boiled eggs that I won’t be able to eat and serve, so I found a different option. Plus, hard-boiled eggs need to stay in the fridge and I want to display my Easter eggs on my dining room table. The solution? Blowing out the eggs.
I’m not going to lie. This is a time-consuming and tedious process. I suggest not doing this with young children, but spending a few hours to decorate eggs like this with teens or your girlfriends will be fun. My husband even joined in on the fun while I was blowing out and decorating my eggs.
Step 1: Blow out your eggs.
Blowing out your eggs is exactly what it sounds like, even though it sounds a little silly. First, wash your eggs with warm water. You make two small holes in your eggshells with a nail or screw, one on each end, with a smaller hole being on the narrow end of the egg and a slightly larger hole being on the wider end of the egg. Just rock your screw back and forth slightly on top of the egg until the tip of the screw makes a small hole in the eggshell. (If, like me, you are unsure about using a screw or nail at all, don’t worry. It’s a lot easier to do than it sounds.) Don’t use a screw or nail to make the hole wider, though; instead, use a toothpick so there is less chance of cracking the shell.
Out of 10 eggs my husband and I attempted to blow out, we ended up with six that did not crack. 😅 So, be sure to have at least a dozen on hand.
Break the egg yolk with a toothpick, and then literally blow the egg out of the eggshell. You can either blow the egg out by touching your lips to the eggshell or using a straw. I found that blowing through the smaller hole works best because it allows the egg to come out through the larger hole. Of course, capture the egg into a bowl. I highly suggest making scrambled eggs or bake something so you don’t waste anything. Then rinse your empty eggshells again to ensure no egg yolk is stuck inside or on the sides. Watch this funny tutorial by ModernMom.
I’ll admit, this part might make you a little lightheaded, so I suggest taking your time or performing this task with a friend. However, this time-consuming act will ensure your eggshells will be able to be used for years to come, so it’s worth it.
Step 2: Choose your colors and design.
For this project, you will need:
- Nail polish, any and all colors
- A cup of room temperature water (Tip: Use a plastic cup you can throw away.)
- Toothpicks
- Cotton swabs
- Paper plates (Again, you will want to throw this away.)
- Paper towels
- Empty egg carton
Gather your nail polishes. If it’s been a while, test some of the older ones to see if they’ll still paint. Depending on how old they are or the type of nail polish brush in each bottle, some will be better for specific designs while others won’t work. You can also test them as you go.
Design 1: Water Marbling
This is my favorite design, although also the messiest. I’ve done this on my nails before, too, but this was the first time I tried it on eggs, and I’m so glad I did! The two eggs I marbled came out great.
Start with a cup of room temperature water. If your water is too hot or cold, the nail polish will sink to the bottom of the cup instead of spreading on the surface of the water. Open a few bottles of nail polish (or just one) that you want to use. Lift one nail polish brush from the bottle and allow it to drip once or multiple times into the water. Lighter shades will need multiple drops for a more vibrant color while darker shades will only need one drop. Repeat with all of your colors until you have rings upon rings or dots among dots in your water. Swirl with a toothpick and immediately dip an egg into the water. The nail polish will transfer to your eggshell and be practically dry once you pull it out of the water.
Tip: Older nail polishes will probably sink to the bottom of the cup, so test the polishes you want to use in the water before creating your design.
Pro tip: Keep your nail polish bottles open with the caps resting gently on top and the brushes fully submerged in the polish bottle. This way you can easily switch between colors without having to constantly open and close them, and your polish won’t dry out in the process.
Work fast when you use the water marbling technique or your nail polish will harden in the water.
I suggest dipping the eggshell into the water halfway and then allowing to it to completely dry for a few minutes, and then repeat on the other half. If you don’t mind the back half of your eggshell being primarily white, you can dunk each shell only once. It all depends on the look you want.
Tip: When you dunk your egg into the water, you will get polish on your hands, so I suggest wearing rubber gloves or having nail polish remover on standby.
After you remove your colorful egg, place it on your egg carton and run a toothpick through the remaining polish in the water. The polish will cling to the toothpick, and the surface of the water will be ready for more polish and another egg. If you skip this step, you might have random specks of color on your next egg.
Tip: You don’t need to add white or clear to get the marbling effect. How the polish disperses in the water will create that effect for you.
To see how to water marble your eggs, watch this video.
Design 2: Stippling
Do you remember stippling in art class? It’s basically drawing a zillion little dots to create a picture. For our purposes today, we’re going to use a larger “brush” – a cotton swab – to apply our nail polish dots to the eggshells.
To understand stippling basics, watch this video.
There are a few ways you can stipple your eggs. I covered the eggs in dots in two ways: 1) Dispersed green and blue dots. This was quick and easy to do. 2) Close-knit ombre dots completely covering my egg. This was the most time-consuming design I did, but it’s one of my favorites.
The third way you can stipple your eggs is to create an image or design with your dots on the egg, such as a heart or cross. I suggest sticking to something simple, so an Easter bunny wouldn’t be the best option with this technique.
To stipple your eggs, you need a few nail polishes, a paper plate, and cotton swabs. Dab a few drops of nail polish and create a small mound of polish on your paper plate. Do this with each color you want to use for one egg. Dip your cotton swab into the polish and dot your egg in the design you want. Repeat with all the colors you want to use.
Design 3: Freestyle
A freestyle design means you get to paint whatever you want! It’s super simple to do and the designs are limitless. You just paint the egg with your nail polish brush just as you would with a regular paint brush. Freestyle designs can take a little amount of time or a long time, depending on how intricate your design is and how many layers of polish you use. The nice thing about this design option is that you just need eggs and nail polish.
My husband took a crack at it and painted his egg with four colors evenly, much like a harlequin design. I decided to draw a cross with a dramatic red background. We both had fun working on this silly, relaxing craft together.
Honestly, nail polish is probably not the best “paint” choice for freestyle Easter eggs, but if it’s all you have, this is a fun craft to do that doesn’t cost a lot of money. It’s definitely worth trying, even if it’s just for a few laughs before buying actual paint or Easter egg dyeing kits.
Step 3: Paint!
Now that you’ve chosen your design and colors, get painting!
For each design, I suggest painting half of the egg and then letting it dry slightly on top of the egg carton. If you are taking a long time to design your egg, such as with stippling, you can paint the entire egg, carefully holding in your hands on the dry or unpainted parts, and when it’s completed, just place the drier end of the egg onto the egg carton so the other half will dry. I suggest flipping your eggs about an hour later because some of the nail polish will want to stick to the carton; gently removing it from the carton will keep your design intact and allow the eggshell to dry completely.
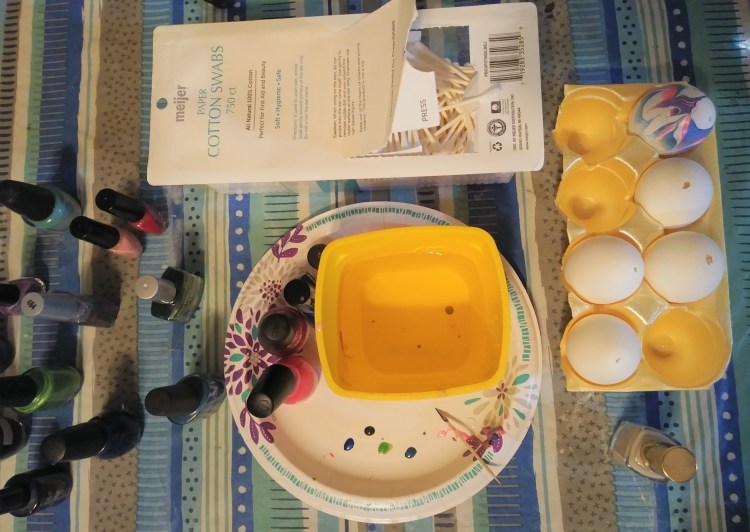
This was my gorgeous setup:
Dry all eggs overnight before adding to a cute basket or another display.
If you tried any of these designs out, please tag @questtype on Instagram and @quest_type on Twitter so we can see your designs.
I hope you have a hoppy Easter!
Discover more from Holy Homesteading
Subscribe to get the latest posts sent to your email.


This is SO COOL! I love that you blew the eggs out too. So fun and nailpolish is epic. Wish I’d thought of this one, way to go!
LikeLiked by 1 person
Thank you!
LikeLike