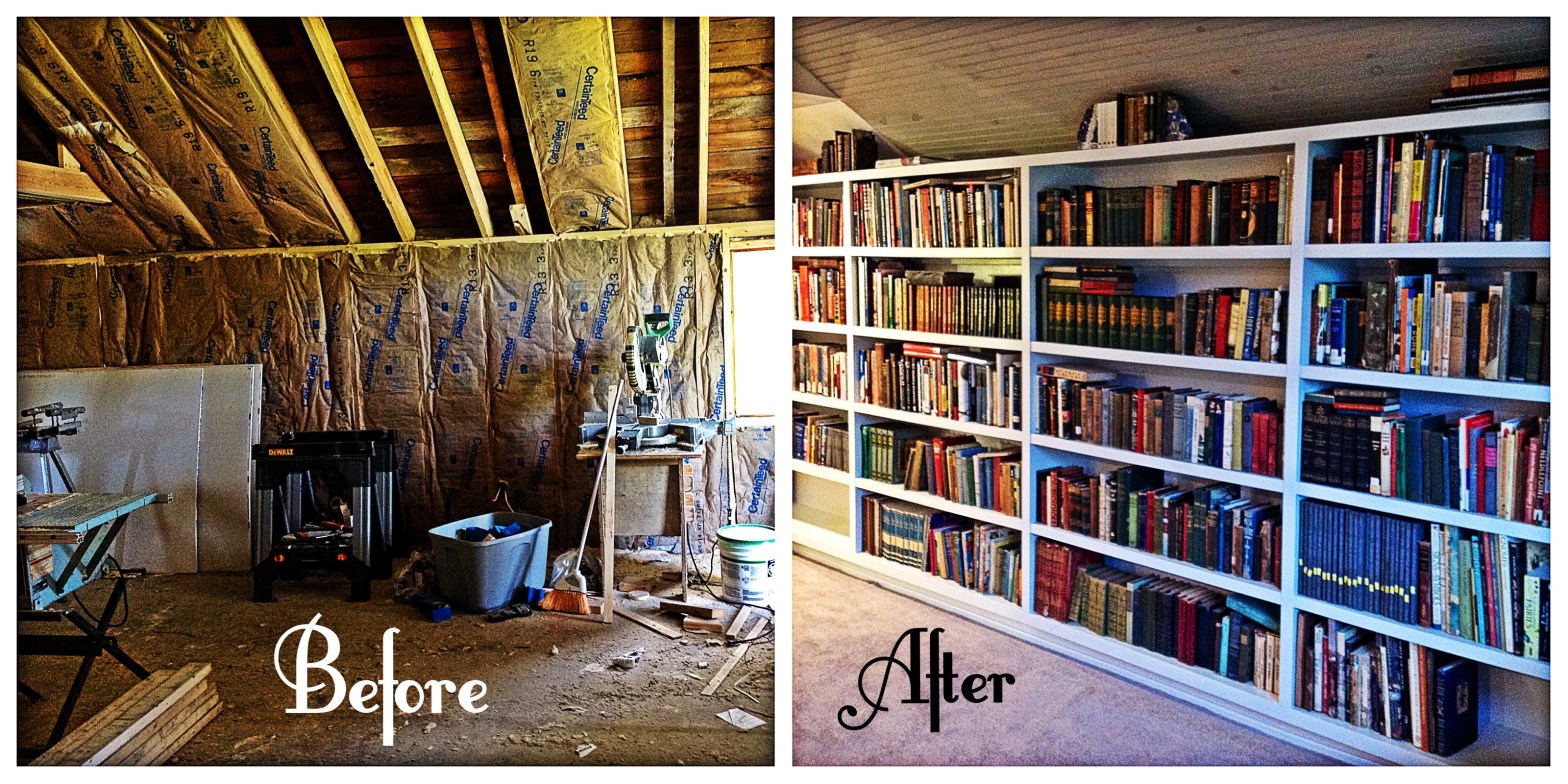
Too many books are squirreled away in the crevasses of my home. It’s high time they had a place of there own. Not just a shelf- a space- a bookspace (it should be a word!). I’ve picked my biggest living room wall (nearly 20 feet) and a contractor. I saved up my dimes after getting a quote and now work has finally begun.
Tip: I used a contractor for a number of reasons but there are plenty of plans available to make shelves if you are handy. Check out This Old House’s black pipe shelves.
The window sills are deep due to my home’s block construction so I requested one window double as a desk unit for writing and it’s the first thing the contractor put in. I confess I sat at the desk after everyone was asleep dreaming of writing in that spot in the near future.


Building makes a mess so be sure you cover anything you don’t want to get dusty. Our living room and kitchen are connected so don’t leave out cake or anything. As work progressed the shelves went up and I placed a few books to see the look.


The hard part came as I paid the bill and the contractor left. I had to caulk and paint all of it. Not for the faint of heart. If you aren’t up for it, hire a painter. If you want to try it here a few tips:
- Caulk sparingly. Cut a tiny hole in the tip of the tube and be precise. Any extra caulk needs to be removed or it will show up through the paint.
- Use a water based painters caulk- don’t cheep out.
- Use a damp towel to wipe away all excess caulk.
- Sand dried caulk off if you miss any.
- Prime any exposed wood or Masonite, yes this is a two/three coat job.
- Use a mini foam roller set to apply your paint to reduce streaks.
- Ventilate your space by opening windows and using a fan to avoid fume overload.
- Have lots of time. Wait overnight to let the paint dry. It took me about a week to get this finished.


Now let’s get the books up! Dreams are coming true in my head like little firecrackers. Decide how you want to organize your books-genre, color, A to Z, random. I want to use little plates for categories, you can find these at your local home store or online.
As I pull out my boxes of books and categorize them onto the shelves I realize how much reading I have to do.
I’ve been photographing my entire collection of old books and adding them to Pinterest in case you want to see more. I’d use one of the many home library apps but most of them run off of ISBN numbers which none of the vintage books have. If you know of a good library app for pre-ISBN, please let me know.
I still have several boxes of books to add to these (if I can find room), it’s a work in progress. While a collection this big may look daunting it’s accumulated over years, you could have a collection like this yourself. A few tips:
- Keep your eyes open for deals. Yard sales, auctions, and even the library free bin.
- Only buy what makes your eyes sparkle and your hands shake from wanting. There are plenty of old books, not all are equal in beauty and content- Arithmetic level 2, no thanks.
- Learn how to clean books correctly. A little TLC goes a long way.
- A book is only as valuable as it’s condition. If the binding is falling off it’s not going to look good on a shelf and it will be hard to read.
- Check AbeBooks for more on values, care, and book collecting culture.
Want more bookshelf transformations? Check out This Old House’s selection.
Thanks for checking out my #bookspace transformation! I can’t wait to hear about yours. Please subscribe if you like our posts.
Discover more from Holy Homesteading
Subscribe to get the latest posts sent to your email.


This looks like it turned out great! I want to do something similar when we move into our house!
LikeLiked by 1 person
Thank you, it’s a ton of work but 300% worth it! It makes me smile every time I see books on them.
LikeLiked by 1 person
What a great transformation!! Looks amazing!
Tonee
https://infoellablog.wordpress.com
LikeLiked by 2 people
Thank you so much!
LikeLiked by 1 person
This looks fantastic! Your own library! That’s awesome. :)
LikeLiked by 1 person
Thank you, I’m so happy!
LikeLiked by 1 person
Awesome work!!!
LikeLike
Thank you :)
LikeLiked by 1 person