

Have you seen all of the awesome aromatherapy necklaces around lately? I decided to create my own, using what I already had at home.
How it works: The clay bead is painted and sealed on the front and on the back the clay is left open, that is where you add 2 drops of your favorite essential oil. It will last for about two days and then you just add more. The clay acts as a diffuser since it is porous the oils soak into the clay and it slowly releases the aroma all day.
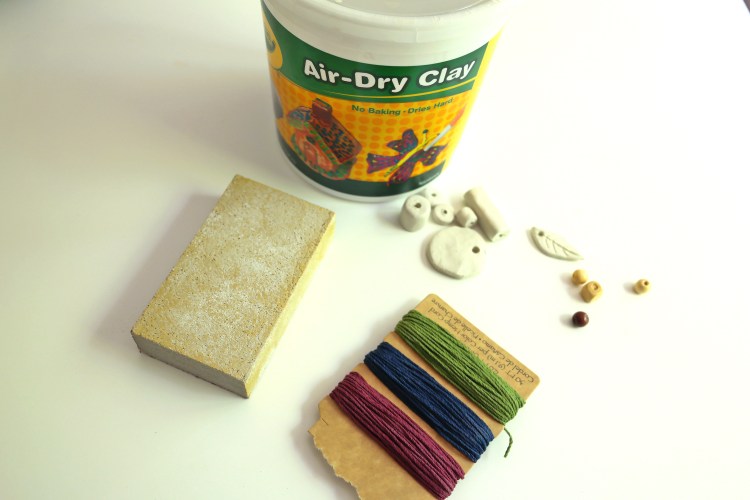
What you will need:
- Air dry Clay
- Sandpaper
- Other beads
- String
- Paint and sealer if you would like to paint the clay but it is not necessary.
How to:
First you need to create your main clay bead that will act as a diffuser. I made mine into a leaf because its something natural and it would go well with the wooden beads I already had at home.
You can have a lot of fun with this, you could use a stamp to create a pattern into a circle pendant or make any type of shape you would like.
After making your beads, you must let them dry for 24 hours. After that I sanded mine down and then painted and sealed my beads.
Tip: Since my leaf had indents to make it look like a leaf I did a antiquing technique. With this technique you paint all over the front into all of the indents let it dry. Then do a coat on top of that with a different color, but do not go into the indents. This allows the indents to stand out more and make it more readable as a leaf.

Once my beads were all dry I took hemp cord for my string and I added all the beads I wanted. I like my necklaces long so I knotted it on the end because it could easily be slipped over my head.
Now all that is left is to add the oil to your necklace, and you are good to go! Let the oil soak in before putting it on to avoid it from getting all over. I also made some awesome bracelets with this technique as well and they work great! I hope you enjoyed this craft, if you have any questions or comments please let me know in the comment section!


Discover more from Holy Homesteading
Subscribe to get the latest posts sent to your email.

