“If this were my house I’d take it all down.” Not the words we wanted to hear from our contractor who had already demoed most of our walls. This time the kitchen ceiling I’d been hoping to save.
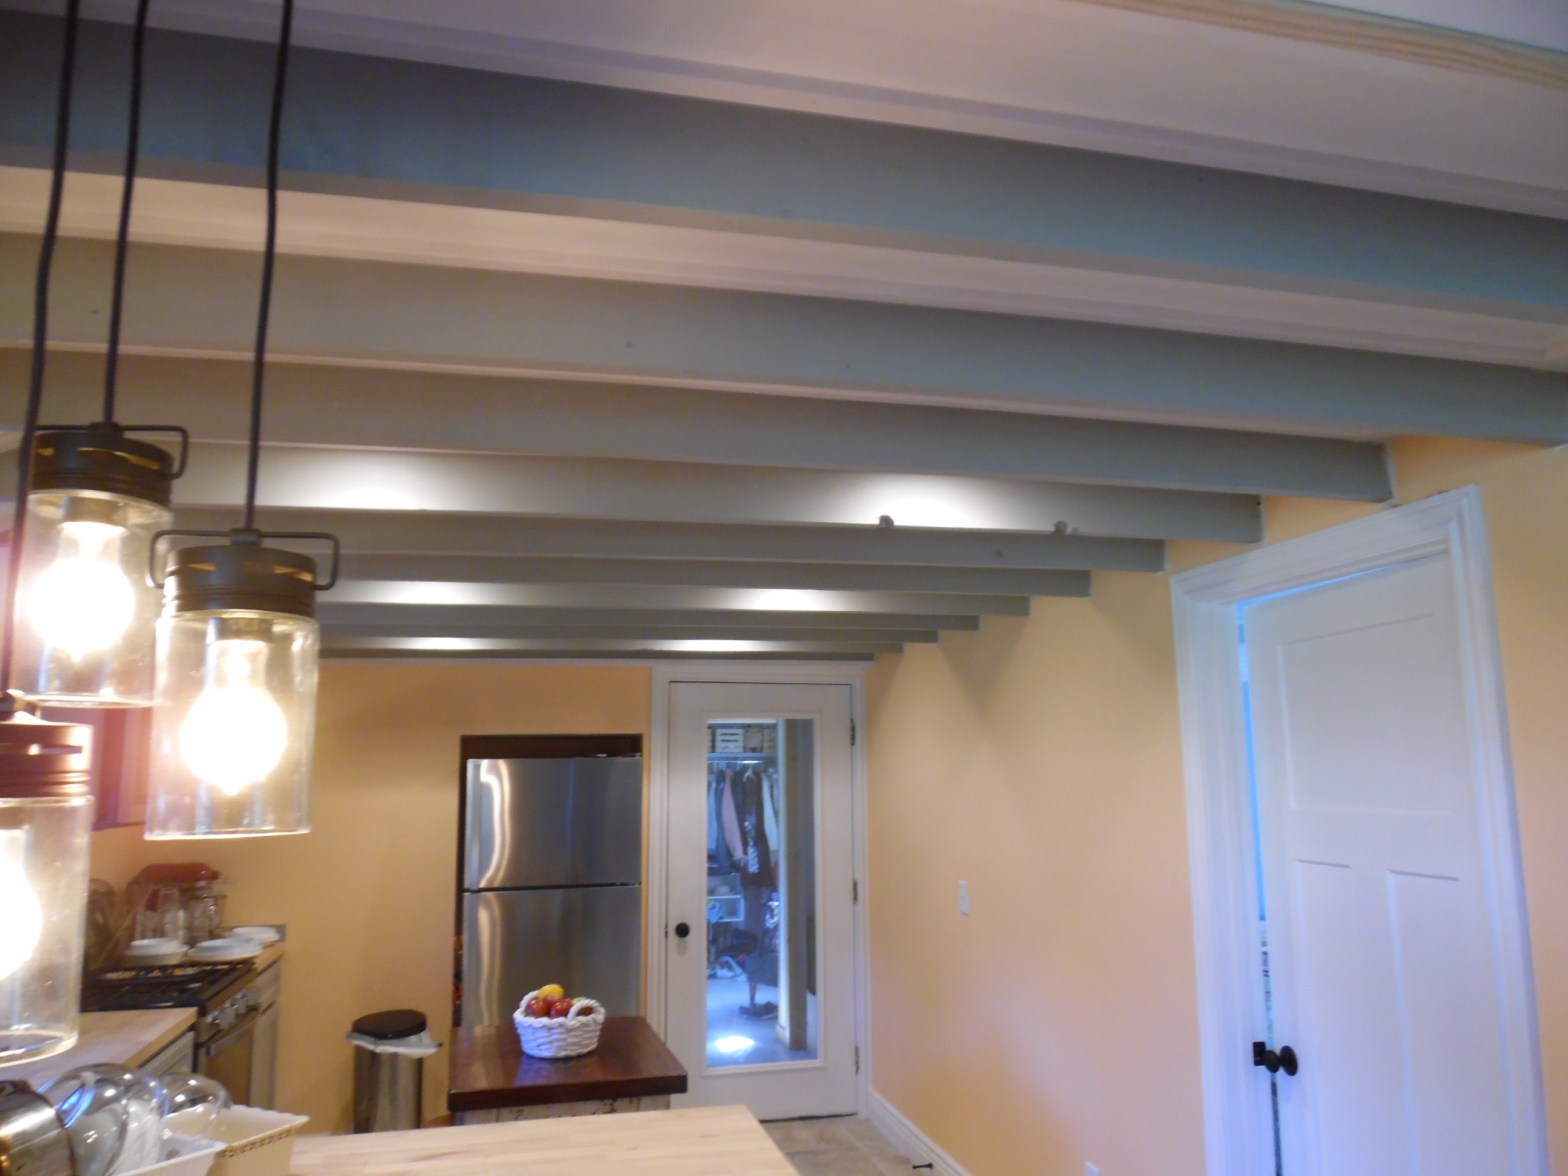
Unfortunately, the original builders used too thin of drywall and nailed it up instead of screwing it. End result, it was caving in. We acknowledged the framers wisdom and created a dusty avalanche of drywall crumbs and brown insulation. To my shock, after the dust settled, we found the ceiling joist beams were rough sawn oak. Thick, textured and beautifully unique- I loved them! However there were dilemmas, namely nail holes, water stains and one was badly cracked. What could I do? Here are the steps I took to a beautiful and unique kitchen ceiling.


First our house is old, and by default that makes it quirky (my hubby uses different words for it). The biggest challenge was low ceiling heights which barley cleared a regular height door. We knew if we didn’t change it the house would feel like a cave- you can see our living room ceiling here. By opening up the ceiling and exposing the beams it makes the ceiling feel taller and more open.
Low light due to a north facing window didn’t help the cave like atmosphere of the

kitchen. To fix this I painted the walls in an apricot color “Funky Fruit” by Benjamin Moore Paints. This gave the room a brightness and again opened it up visually.
Next we needed to fix the beams. I cleaned each beam, filled any nail holes with wood putty, and used solid wood stain to hide water stains. Later I was able to find kitchen cabinets in the same gray color to match- score! The cracked beam was tricky we had to use some hefty screws to re-join it but it worked out in the end.


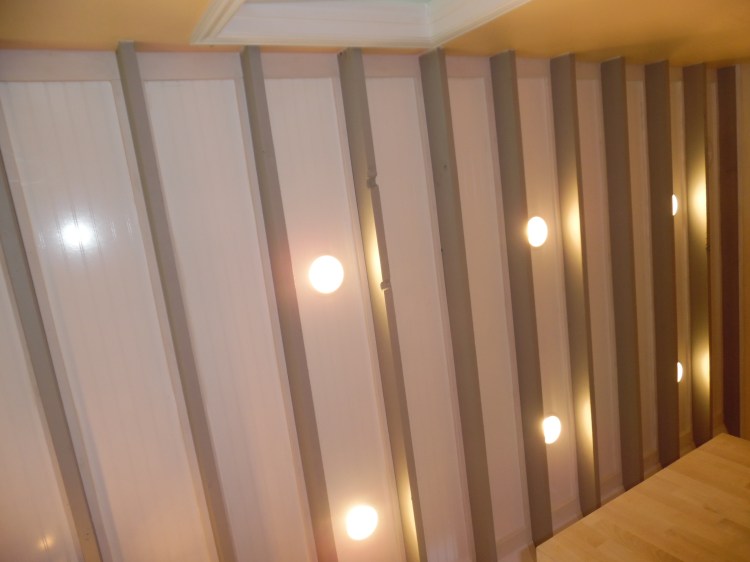
The gap between the beams I chose to put up bead board with trim edges instead of drywall. The bead board was pre-finished in a high gloss finish to reflect light down into the room allowing it to feel open. An additional plus is not having to paint it again risking the already finished beams.
Taking down the ceiling meant I had the opportunity to add new lighting. I chose recessed lighting that was rated to sit in insulation in the attic. I illuminated the walkway through the kitchen, the cooking area, and added a dinning room light to designate each different space.


Overall, I’m so pleased with how the ceiling turned out. I was shocked at the amount of extra time and work went into getting them where I wanted though. This is not an easy DIY project but if you are mid-swing on a remodel it’s worth checking into as an option. What do you think of the ceiling beams? Do you have the option to do this in your old home?
Discover more from Holy Homesteading
Subscribe to get the latest posts sent to your email.

