
Making necklaces is almost nostalgic for me, since I grew up making jewelry all of the time with my sisters. You can buy cute crystal and gold necklaces in stores, but you can also make them at home. Here is my DIY on growing crystals for necklaces.
Supplies:
- Borax
- Glass jar
- Chop Stick or Wooden Skewer
- Food Coloring (I used blue)
- Wire Cutters
- Wire
- Braided String
- White Pipe Cleaners
- Boiling Water

How to:
First you need to make your pipe cleaner into the shape that you want. I will demonstrate below how I achieved the shape I got. This step is really important because it effects what it looks like in the end a lot. You can shape your crystal to be a circle or a pendant or anything. The shape of your pipe cleaner will be the shape of your crystal in the end. As you are doing this you should start to boil water, enough to mostly fill your glass jar.

The first thing you want to do is figure out the length. Bend it to the length you want, then you basically will wrap the rest of the pipe cleaner around that length as tight as you can. You want to leave a loop at the top so you can slide in the wire which you will use to connect the crystal to your braided string to create the necklace.
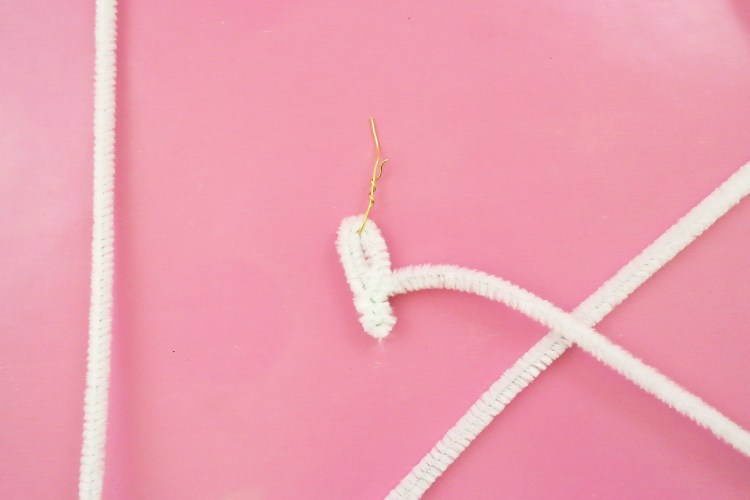

When you completely wrapped the pipe cleaner around itself you then can attach the braided string. Cut the braided string to the desired length of your necklace. For now this is to just connect the crystal to the chop stick to hold it. We will after the crystal has formed make the string attached in a way that looks better.

You can set that aside, and grab your glass jar and set it in the kitchen sink. Take your boiling water and fill about 3/4 of the way full.


Mix in about 5 scoops of borax. If you are using a different amount of water just add until it stops dissolving, the water will be a little cloudy.
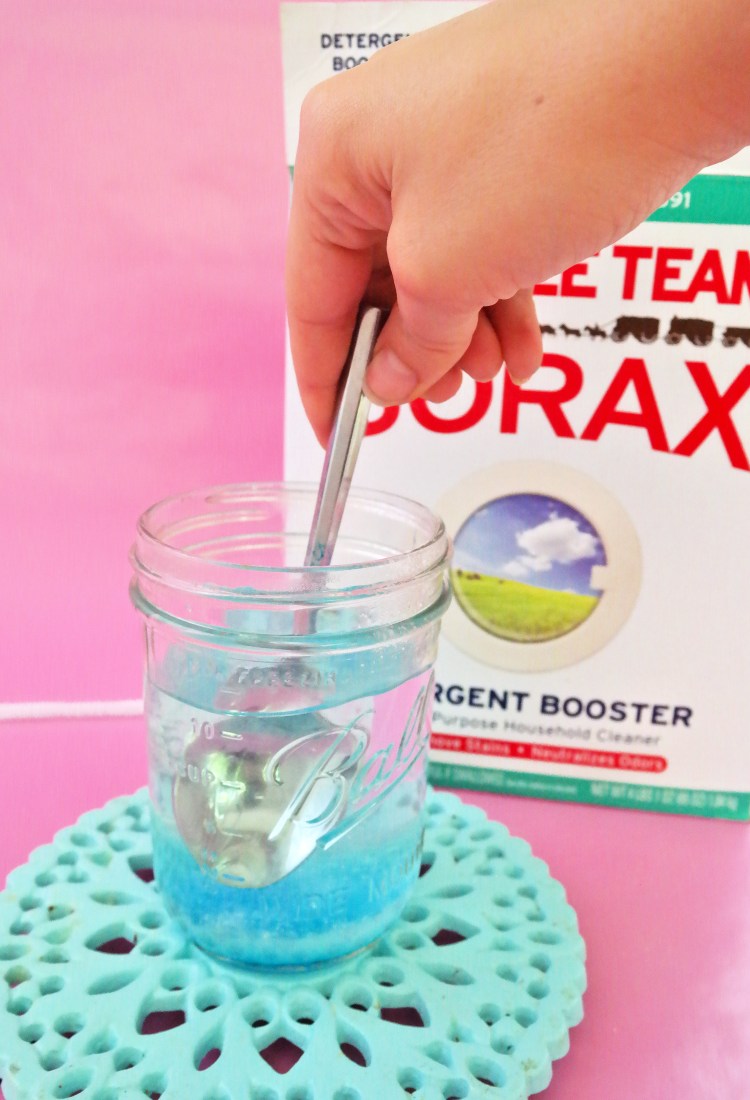
Mix well. Now you can add your food coloring. You can use any color, I used blue about 5 drops of it. You can add more if you want it more vibrant or less if you want it more pastel.
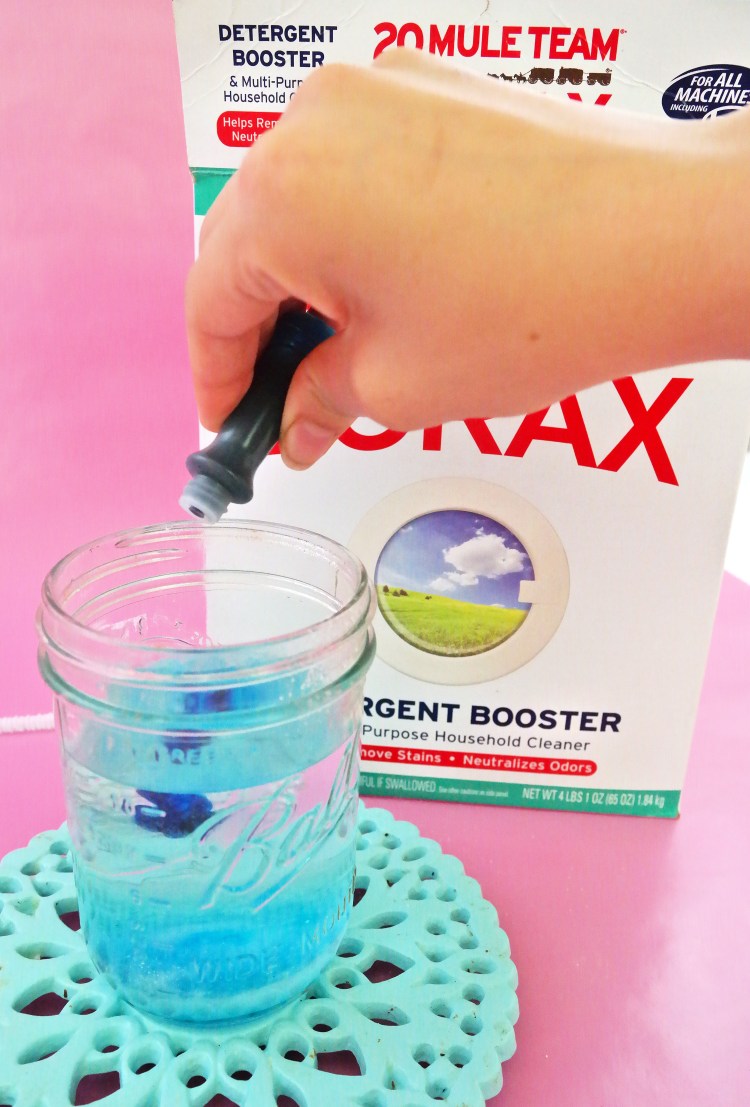
Mix well.
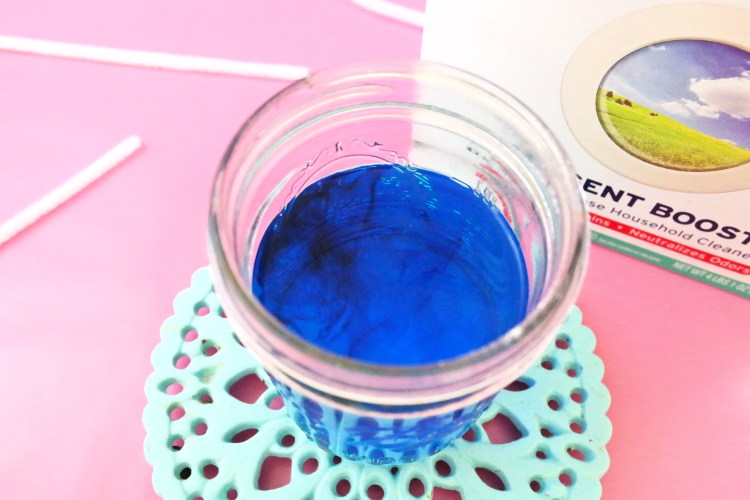
Now set your pipe cleaner into the water until its completely covered.
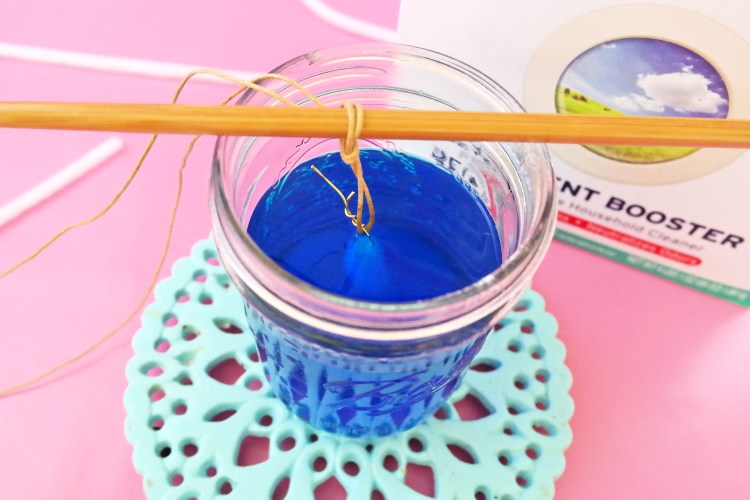
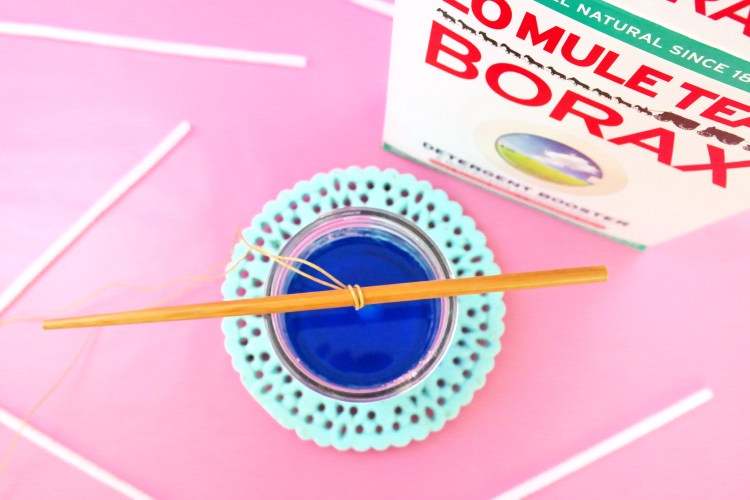
Cover with tin foil or plastic wrap and let sit for at least 8 hours or overnight.

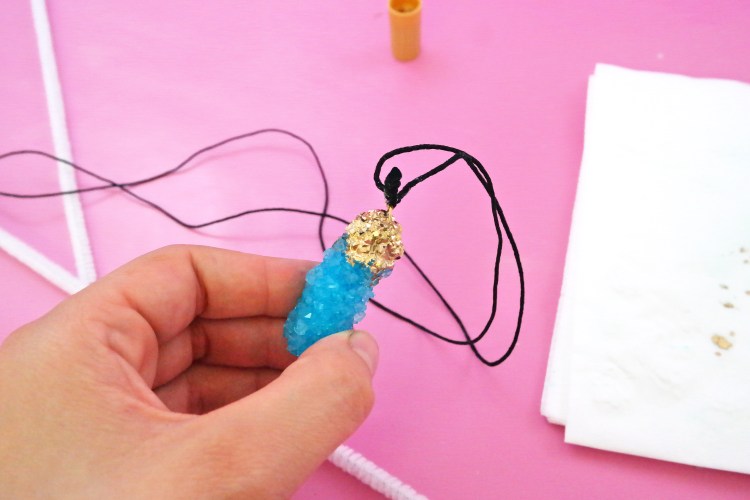
After letting your crystal grow for at least 8 hours, you are ready to assemble your necklace!

There will be crystals growing on the wire you can easily remove that and clean it up so it looks nice.

Set the crystal on paper towel or napkins to let any moisture dry. Now take the wire and form a loop and cut off any excess. Take the braided string and wrap it around the wire and knot it to hide and sharp or unwanted wire and to connect the pieces together. You can then knot the two end string pieces together to create the necklace.

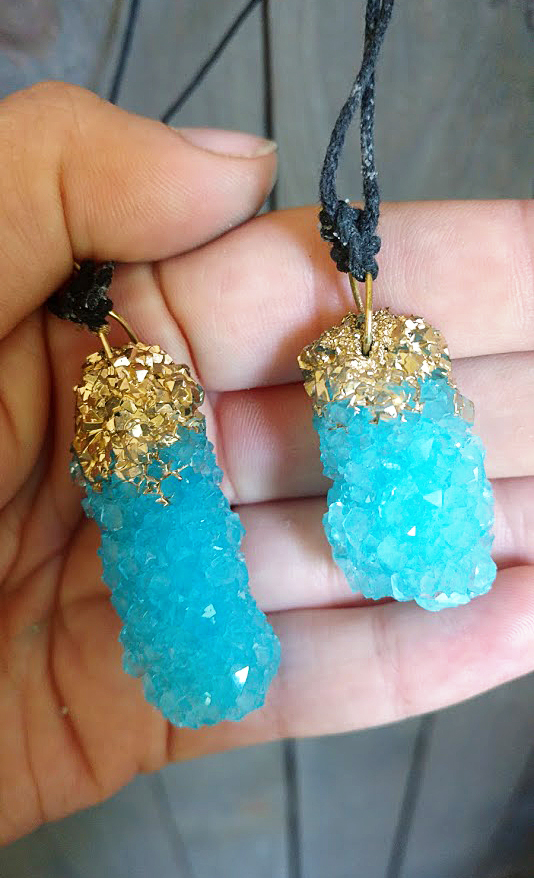
For the finishing touches we are going to add some beautiful gold to this crystal.

After you add the gold you are all finished, I hope you enjoyed this DIY!
Happy Crafting!!!

Discover more from Holy Homesteading
Subscribe to get the latest posts sent to your email.


This looks so amazing! I have never heard of this technique before but it’s awesome! Definitely going to try this!
LikeLike
it’s really beautiful, too simple to make at home. thanks for sharing with us…
LikeLike