
Grab your freezer paper and fabric paint because we are going to use it to makeover a t-shirt! My sister gave me a magnet that had the Quest Type logo on it and that got me thinking that I should make a shirt with our logo on it. Freezer paper makes this DIY super easy and gives you clean lines so you can create more than block letters.
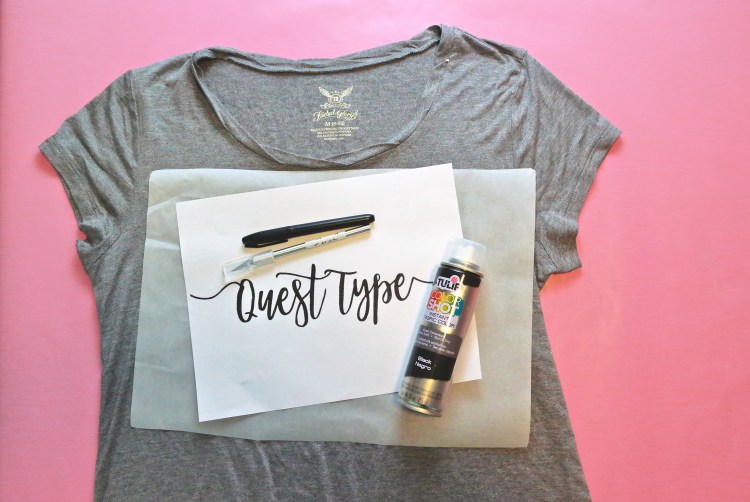
Supplies:
- Freezer paper
- Fabric spray paint or regular fabric paint
- Printed design
- X-acto Knife
- Iron and Ironing board
- Marker
- Cutting board
- Cardboard
- T shirt or any fabric that you want to put a design on
I did this DIY about 4 times before getting it to work so I will make sure to share with you what went wrong and what worked. My first attempt I tried parchment paper for the stencil, this did not work because it moved too much. I also tried wax paper and had the same issue. Freezer paper was the answer, you can cut out your design and iron on the non waxy side and it sticks right to your fabric like a sticker. This makes sure the paint goes where you want it to.
First you need to print out your design the size that you want it to be on your shirt. If you want this to be super easy you can use big block letters if you want it to be a little more challenging try a script font.
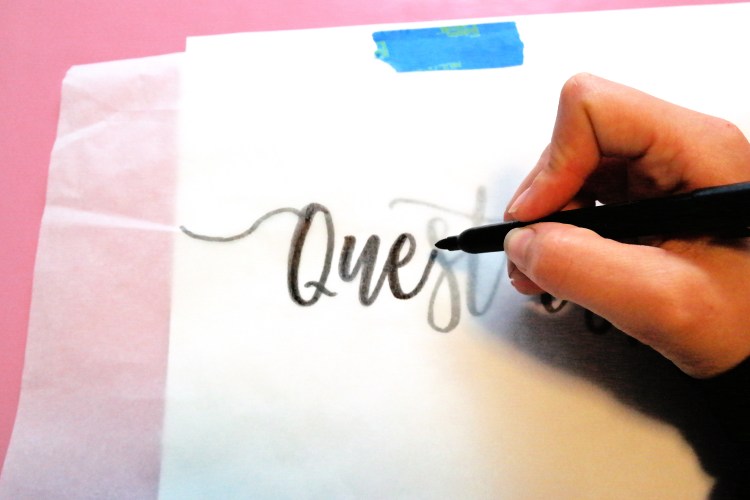
Then cut out a big piece of freezer paper and and set it on top of your design. Make sure the plastic waxy side is facing down. Take your marker and draw the design onto the freezer paper. You should be able to see through the paper enough to copy it over. If not you can hold it up to a window during the day so the sunlight shines through and it will show the design.
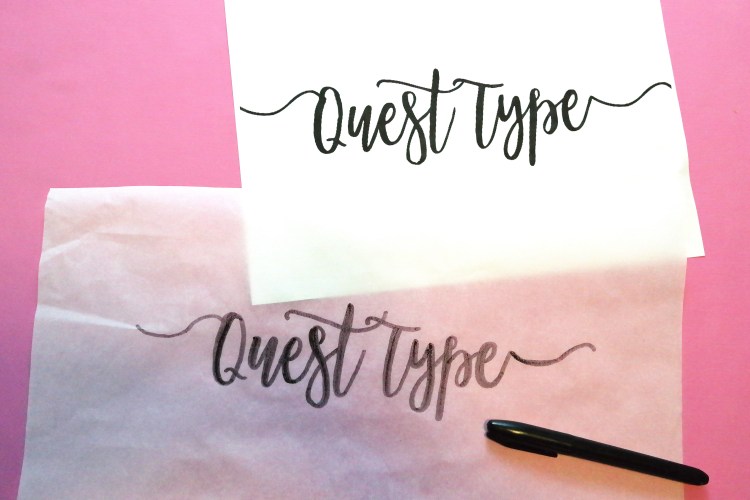
After copying over your design onto the freezer paper you can now cut it out with your X-Acto Knife. Make sure to put down a cutting board and it also helps to tape the freezer paper down so it doesnt move on you while you are cutting. You want to be as exact as you can during this part because it is what makes your design look clean.

Make sure to save the inside of the letters you need those to complete your design. After that’s all cut out pull out the marker drawn parts and set onto your fabric. I put my shirt onto an ironing board, and then set the freezer paper on top of that in the spot that I wanted my design to go. Set the inside of the letters onto the fabric too and make sure they are lined up just how you want them to be.
Plug in your iron and when its warmed iron on top of the freezer paper. This is why its important to have the wax side down because the iron heats up the wax and temporarily adheres to the fabric. You do not want to put the wax side onto your hot iron that would make a mess. Its also very important to have everything lined up perfectly before ironing since this will hold it in place. You can use tweezers to maneuver really small pieces.

Slide in a piece of cardboard in between your shirt to stop any paint from leaking through. You should also paint it outside or in a well ventilated area. Now your stencil is stuck to the t shirt you can take your fabric spray paint and lightly coat the stencil. Make sure just to go over it once.

On my second try I went over the design twice with the paint and it made one spot too wet and it began to seep into unwanted areas. So be careful use just a small amount. If you are using regular fabric paint you can just use a paint brush for this part. I think its best to stay with bigger type designs that have less small pieces but it can be done it just takes a lot patience to get everything lined up and looking good.

Let it dry completely this didn’t take long maybe a half hour. Once dry you can peel up the freezer paper like a sticker, make sure to get the insides of the letters too.
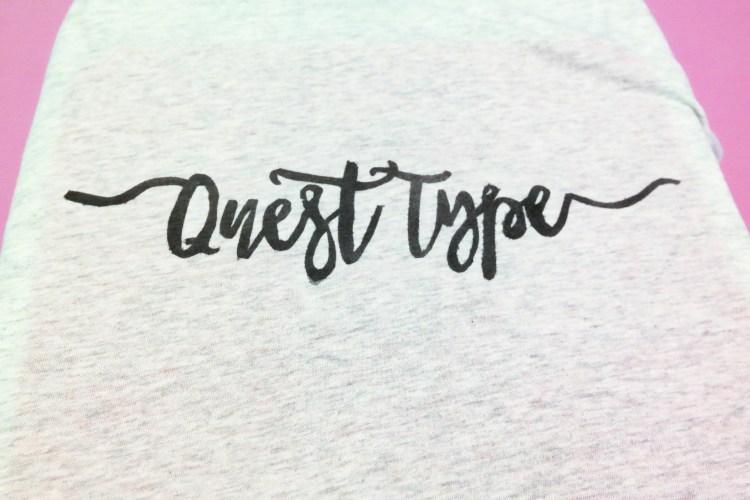
And that’s it! You are done making your own custom t shirt! You could use this on a tote bag, table runner, decorating any type of fabric with any kind of design. One of my friends had a great idea of doing a design on a onesie for a baby shower. You could do a pattern or try different shapes, there is a lot of different ways to use this DIY.
Happy Crafting!

Discover more from Holy Homesteading
Subscribe to get the latest posts sent to your email.


Forget a like button I need a love button!! This is so cool!!!
LikeLike