
For those of us less handy with a paint brush I’ve got this DIY for a cute planter.
From the dollar store, I bought:
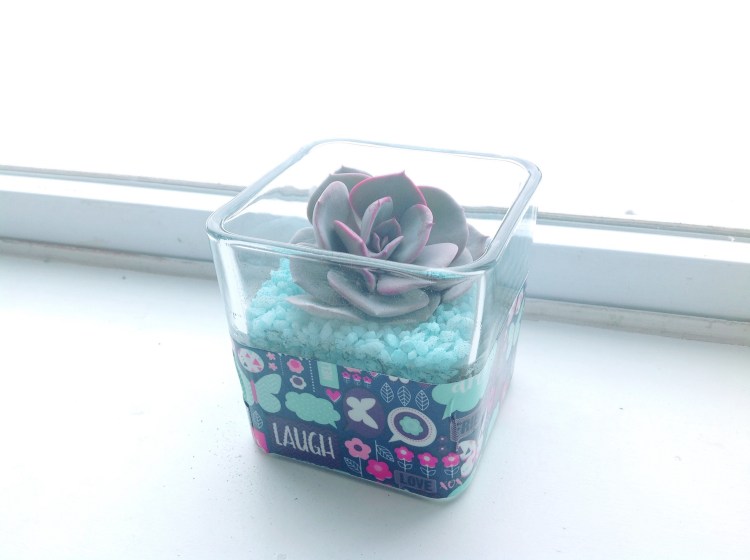
- Glass dish: square is best so the tape wraps well $1
- Duct Tape: the fancy pattern type $1
- Colored Rocks- matching the tape pattern $1
- Succulent- You can get the fake ones but I had one I needed to plant at home.
- Planting Dirt- Succulents like porous soil that drains well. I had some already.
- About 15 minutes
So I’m all in for $3.oo on this project. Now onto the fun!
I removed the price sticker from the bottom of the glass and opened up my tape. I wanted the tape to hide the dirt under the pretty rocks I’d be adding. So looping the tape around the glass was a slow process. I did make a small slice at the corners so I could fold the tape without loosing the pattern (due to the vase being slightly smaller at the bottom than the top).


After my tape was placed like I wanted I added dirt to just below the tape line and wetted it. Next I added a layer of blue rock about a 1/4″. If you are using a fake plant the depth of rock isn’t as important but I need to still plant a live succulent. Making a center hole I inserted the succulent stem through the rocks and into the dirt below.


Enjoy your new potted plant. Mine is a housewarming gift for a wonderful friend. You could also place this in a cubicle at work or make several and use as centerpieces at an event.
Happy Questing!
Discover more from Holy Homesteading
Subscribe to get the latest posts sent to your email.


This is such a cute little idea! I love it! 😊💕
https://busybeeblogweb.wordpress.com
LikeLiked by 1 person
Thanks Tabi! Best part was how fast it was 😊💞 glad you liked it.
LikeLiked by 1 person
Thanks! I had fun making it :)
LikeLike
Great idea. Simple, quick, and cute.
LikeLiked by 1 person
Tonya! Thank you, it was fun and fast. Perfect if you want to make a bunch of them.
LikeLike